In my previous blogs I have documented the journey to getting Virgin Media’s XGS PON powered broadband installed and as you will see from reading them the inculded Hub 5x is limited in features and at the time of writing (21/7/24) does not have Modem Mode working properly which makes using your own router tricky. It is possible to bypass the Hub 5x altogether with the help of the WAS-110 SFP+ module this blog will detail what is required to achieve this.
You can get £50 cashback with any Virgin Media package using our link here
Background
Virgin Media’s new XGS PON broadband powered by Nexfibre’s new network offers speeds up to 2Gbps symmetric and is rapidly being rolled out across the country.
Unlike most FTTP installs all you get is Virgin Medias Hub 5x and the fibre goes directly into this rather than via an ONT.
An ONT would allow you to plug your own router quite eaisly where as the Hub 5x is already the router.
While Virgin Media’s DOCSIS based routers or hubs have offered a function called Modem Mode for years they have still not got it fully working on the Hub 5x.
Modem Mode essentially turns off all the router features of the Virgin Media Router/Hub making it act more like an ONT and it just passes the public IPv4 address right though to your own router.
As I documented in my last blog Modem Mode is not in the GUI natively and while I was able to get it working using a hidden page it only works on Port1 which is limited to 1Gbps or 950mbps throughput which means you are not able to achieve the full line speed of the Gig1 or Gig2 services.
It has also come to light that Virgin’s automated hourly performance speed testing done on Hub5x has caused issues with the service epically on Gig2!
There is another option and that is to use a SFP+ module that you plug the fibre cable into and this handles the XGSPON side allowing you to use your own router with full speeds.
There is a fantastic community called 8311 that have come up with the firmware and instructions to get this working not only for Virgin Media but other ISP’s around the world without them none of this would be possible so a huge thanks to the 8311 community.
Pre Requisites
Before we go any further just a disclaimer that by following this guide you do so at your own risk and note you will not get any support from Virgin Media and if you have any issues with your service you will need to plug your Hub5X back in for troubleshooting with VM.
This is intended for technical people who wish to use their own router and understand the risks involved.
You will need the following for this project:
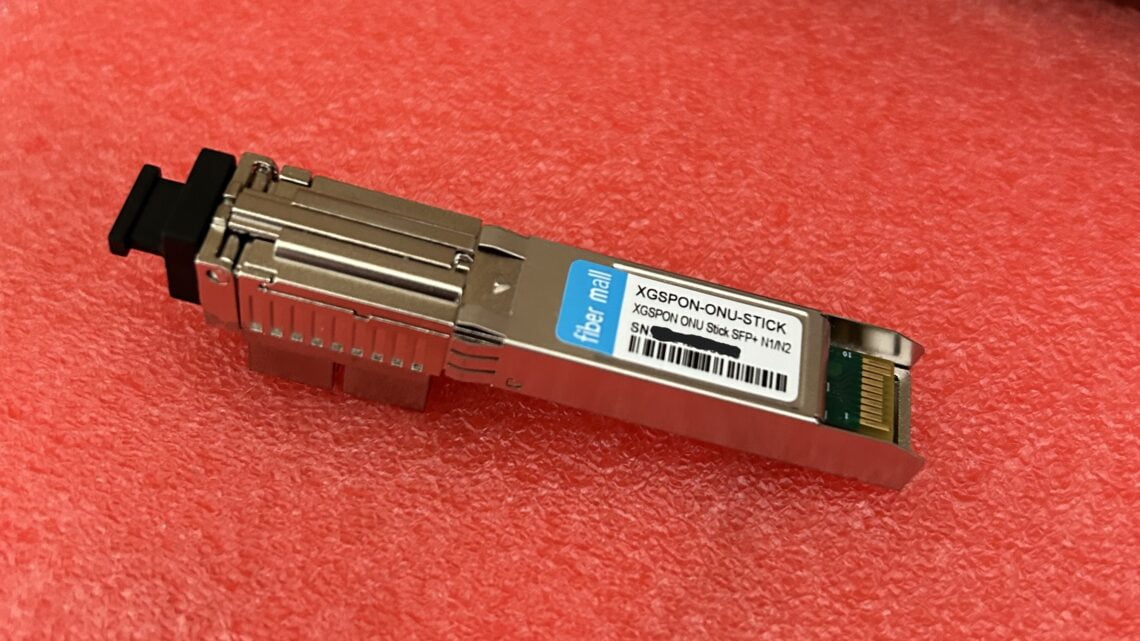
- An XGSPON ONU SFP+ Module compatible with the 8311 firmware
- LC/APC to SC/APC cable or adaptor
- A device with a spare SFP+ slot (ie switch, router etc)
You can now order a kit with everything you need (bar the router) from the Better Internet Store based in the UK with UK stock and is run by the people behind the Better Internet Dashboard.
You will get a X-ONU SFP+ stick preloaded with the 8311 Firmware and there is an option to have it configured for you if you provide your Hub 5x PON serial number from the label on the bottom of the router.
You will also get a 5M LC/APC to SC/ACP cable and an adaptor so all you will need is a router or switch with an SFP+ port.
This will save you having to follow most of the steps in this guide.

Setup

Here are the links from the 8311 Discord community which provide the full details and may provide more up to date info always worth a read as well.
The following are the steps you need to follow (based on using a Windows device for setup) to get the WAS-110 working with VM XGSPON for those that prefer a video guide see my video above or click here:
Plug the WAS-110/X-ONU SFPP into a 10Gbps capable SFP+ port (note some devices such as Mikrotik switches do not bring up the WAS-110 unless an active fibre is connected to it).
Get a connection to the WAS-110 by either:
- Putting your client device into the same subnet as the WAS-110 by setting a static IP of 192.168.11.2/24 with default Gateway 192.168.11.1
- Adding a static Route to 192.168.11.1/24
See if you can get to Web Gui (http://192.168.11.1) and ping the WAS-110 on 192.168.11.1.
If you have purchased a stick with the 8311 firmware preloaded then at this stage you should be presented with the 8311 web gui look for the 8311 branding.
If this is the case you can skip to Step 13
Depending on the stock firmware of your WAS-110 stick comes with try the following default web gui credentials:
For Firmware V1.0.21 and above:
| Username | Password |
| admin | BR#22729%635e9 |
| user | user1234 |
For Firmware V1.0.20 and below:
| Username | Password |
| admin | QsCg@7249#5281 |
| user | user1234
alternatively if they are not working try follow these steps:
- a. Enter this URL into your web browser http://192.168.11.1/cgi-bin/shortcut_telnet.cgi?cat%20%2Fptrom%2Fptconf%2Fparam_ct.xml
- b. Copy the XML file into your favourite text editor
- c. Parse the XML for the admin password eg:
value=”admin”></param><br /><param name=”Password” rw=”2″ type=”s” flash_rw=”1″ noti=”0″ noti_rw=”1″ key=”0″ flash_encryp=”1″ value_encryp=”1″ accesslist=”Subscriber” value=”plain text password”>
Once you have found the password log into the web gui.
Once logged into to the WebGUI go to Service tab>Service control and enable SSH.
Download the latest WAS-110 8311 Basic firmware from
https://github.com/djGrrr/8311-was-110-firmware-builder/releases
Once downloaded extract the contents of the .7z compressed folder.
Enter this in your web browser to change the root password to ‘root’ for SSH login.:
In windows explorer navigate to the extracted WAS firmware folder extracted earlier then shift+ right click and choose ‘run powershell window here’
In the PowerShell window enter this code to copy the 8311 firmware onto the WAS-110 via SCP:
scp -oHostKeyAlgorithms=+ssh-rsa -oPubkeyAcceptedKeyTypes=+ssh-rsa local-upgrade.tar [email protected]:/tmp/
Once the file has finished transferring from Step 9 run this in the same Power Shell window to install the 8311 firmware to Firmware Bank B on the WAS-110:
ssh -O -oHostKeyAlgorithms=+ssh-rsa -oPubkeyAcceptedKeyTypes=+ssh-rsa [email protected] 'tar xvf /tmp/local-upgrade.tar -C /tmp/ -- upgrade.sh && /tmp/upgrade.sh -y -r /tmp/local-upgrade.tar’
Once the 8311 firmware has installed and the WAS-110 rebooted check it has now got the 8311 firmware by logging into the webgui with user root and no password (be sure to set one after)
You should be greeted with the 8311 web gui.
You will then need to repeat Step 10 to install the 8311 Firmware again.
This is because the WAS-110 has two firmware partitions or banks A+B by installing once you have only installed to one of the banks and the original firmware is still on the other bank/partition.
By installing the 8311 firmware twice your installing it on both Banks/Partitions which in the event it decides to boot from the other bank/partition you will still have the 8311 firmware.
It is possible the OLT at the other end may trigger the change of firmware to boot from the other bank/partition.
note when SSHing onto the WAS-110 after installing the 8311 firmware the host key will have changed so you may need to add/update this on your trusted hosts in your SSH client.
After installing the firmware twice and the WAS-110 has rebooted you should now see the firmware on both banks/partitions
you can find this under 8311 menu and Firmware.
In the WAS-110 web gui head to 8311 from the top menu and choose Configuration.
In the Configuration screen enter the following info leaving everything else as default:
- PON Serial Number (ONTID) = PON serial number from label on hub 5x
- Equipment ID = F5685LGB
- Hardware Version = 1.2.1b
- Tick Sync Circuit Pack Version option.
- Software Version A+B = 3.7.4-2306.5
- MIB File = /etc/mibs/prx300_1V_bell.ini
- IP Host MAC Address = C4:EB:43:00:00:01
Once entered save and then reboot the device using System>reboot from the top menu and if you have not done so already connect the fibre cable (SC/APC end) into the WAS-110.
Once rebooted log back into the WAS-110 Web Gui.
Then under 8311 menu choose PON status
On the status tab you should hopefully see this line
PON PLOAM Status : O5.1, Associated state
While getting O5.1 is a good sign it does not guarantee you will get a working internet connection as you can get what’s known as false/fake O5 see this for more info.
Connect your WAS-110 to your router and you should by now pick up a Virgin Media public IPv4 address and have a working connection.
If you don’t then double check the details are correct in 8311>configuration page if your still having issues try following the troubleshooting here.
Its also worth noting that some people have found they are not getting a WAN IP on their router if your having issues its worth trying this:
Go to 8311>Configuration menu then click on the ISP fixes tab.
In here untick/disable the ‘Fix VLANs’ option then reboot the WAS.
Then use VLAN Tag 100 on your routers WAN interface and or anything in between the WAS and your router.
You can reach out to the 8311 Community discord chat if you have any questions or issues.
My own experince
I ordered my WAS-110 from Fibre Mall which arrived quickly considering it came form China and got it working using the above steps.
It has been working fine now for a few days.
Mine is plugged into a Mikrotik CRS-317-1G-16s+ running in Switch OS mode.
The port on the switch is in its own VLAN which then routes to my pfSense Router for the WAN interface in there.
Once I did the setup and entered the correct details my pfSense router picked up the VM Public IPv4 address and been solid ever since.
The WAS-110 can run hot mines running at ~60C but been told that’s normal.
Its nice to be able to use my own router without the Hub5x in the equation and being able to monitor the XGSPON light level in my switch (and the web gui of the WAS) is also useful.
Hope people find this useful and again huge thanks for the 8311 community for making this possible!
Great blog post. I have this working and it works a treat.
Cheers Barry
Huge thanks for this guide – just set it up works great. One note – when copying and pasting step 10 the — comes through as a long line rather than a double dash so produces an error in powershell, was easily resolved but wanted to mention it in case it helps anyone else
Thank you for the kind comment glad you found it useful.
Thanks for the heads up on the PowerShell code guess the formatting got a bit messed up will see if I can correct this!
Thanks for this guide, really great instructions and I’ve managed to update the firmware as described.
However, the temperature of the WAS-110 is crazy hot in my UniFi Dream Wall. My unit got to 82 degrees C before I decided that was enough and shut it down. Removing the module required gloves it was that hot. Do you think I have a dud module?
Cheers Matt glad you found it useful. 82C is rather high mine sits around 60C even in hot weather so you may have a faulty unit.
You could get a cooling solution for it to try and keep the temp down.
Hi Matt,
I have a 30mmx30mm fan sat on mine, this reduced it from 69 to 48.
There are 3D printable mounts for it as well.
Link to Fan
https://www.amazon.co.uk/dp/B0CB1B2193?ref=ppx_yo2ov_dt_b_fed_asin_title
Link to mount
https://cults3d.com/en/3d-model/gadget/30mm-fan-mount-for-azores-was-110-sfp-ont-stick
I used superglue to attach the fan to the mount then cable ties over the stick.
Great post! Just 1 thing to note, Virgin media is an LC/UPC connector and not APC. I’d advise swapping that cable out as using the wrong type creates huge signal losses and can cause issues on the XGSPON network.
Cheers, The provided VM/Nexfibre LC cable and connectors/faceplates are all LC/APC (Green Connectors) LC/UPC have blue connectors.
Hmm, very strange. Mine is the hub 5x and the connector is definitely UPC, maybe they have different models? My hub hardware version is 1.2.1b
Excellent post, did this last night and all is well.
One thing, after step 10 the reboot on my WAS-110 took between 7 and 10 minutes to the point where I thought I had bricked it. When it came back the next reboot after step 11 only took around 2-3 minutes.
Not to worry though I am very happy.
This is really interesting as id be willing to ditch the VM hub.
My issues is where my virgin comes in is not near where I have my comms rack, I have cat6 running from the virgin hub upto where my rack is, are you aware of anything small that can be a replacement for the hub, that I can put the sfp in and and then pass everything over to cat6 to the router, or act as as router itself (that I can just terminate into my switch). Or is there a way to extend the fibre that comes in into my comms rack so I could terminate the fibre there?
Hi Aaron,
You can use a media convertor with a SFP+ and 2.5/10GbaseT RJ45 then plug the WAS into the SFP+ port and your cat6 into the RJ45 port on the media convertor.
You could also use a small switch with SFP+ and a 2.5/10GBbaseT port or you can get fibre extension cables.
I had one of these that did this for me before I got a router that had built in SFP+.
https://www.aliexpress.com/item/1005007391933720.html?spm=a2g0o.productlist.main.1.3cf47Yqk7YqkRH&algo_pvid=5ae61d33-415b-4897-967b-eb974d3e6bd0&algo_exp_id=5ae61d33-415b-4897-967b-eb974d3e6bd0-0&pdp_npi=4%40dis%21GBP%2196.42%2129.89%21%21%21875.75%21271.48%21%40211b80e117253493574571335e9c44%2112000040567142154%21sea%21UK%216035032281%21X&curPageLogUid=b8FveCacwu9m&utparam-url=scene%3Asearch%7Cquery_from%3A
Do you mind to share your pfsense settings.
Prob a bit much to go into here in the comments but feel free to reach out on Discord via the 8311 channel!
Hi Nathan
Thanks for your work! Any guide for BE800? or it has to be some other network switch. it has combo port but when chosen SPF+ port i cant see PON stick. Any chance to look in manual(be800) and get some advice
Hi Adamski I’m sure someone else on the 8311 discord in the UK is using the TP Link Be-800 try posting on their lots of people including myself that can help 🙂
Hi there, i have cityfibre ont, how to replace? Thanks!
CityFibre operate both a GPON network and XGSPON so first thing to find out is which one of those you are on.
then I would advise joining the 8311 discord and posting in the UK general board
Depending on version of SCP there may be some incompatability leading to this error at step 9:
“`
ash: /usr/libexec/sftp-server: not found
scp: Connection closed
“`
The solution is to use a legacy support option in SCP (-O), i.e.
“`
scp -oHostKeyAlgorithms=+ssh-rsa -oPubkeyAcceptedKeyTypes=+ssh-rsa -O local-upgrade.tar [email protected].1:/tmp/
“`
Thank you for the heads up, also worth noting this guide is mainly targeted at Windows based users so some commands may vary between OS and or software versions.
Hi Nathan, thanks for all the effort you put into these guides and blogs. I have been following with keen interest.
I recently got XGSPON VM installed myself, however, I am having issues with my VPN services. PIA and Cisco for work. I wanted to ask whether you would know any solutions using the VM hub, or whether following something like this guide would be the best bet in trying to resolve things?
Hi M.B, thank you for the kind feedback 🙂
I have not experienced any issues with VPN’s myself on the VM line I use Always On VPN for work, NordVPN, Wireguard and OpenVPN.
You could first try seeing if you can get the Hub 5X into Modem Mode using the workaround posted in my other blog here https://fttppro.co.uk/getting-virgin-medias-new-xgspon-broadband-installed-part-3/
Failing that I would raise it with VM as those services should work on the connection I would not want to recommend spending the money on the WAS etc as its not guaranteed to fix that sort of issue.
Feel free to reach out to us via the 8311 Discord 🙂
I am getting the ‘O2.3, Serial number state’ – One of the ‘Fake05’ states.
Does that mean I will be unable to get this solution working?
My router is not getting a public IP at the moment despite Disabling the ‘Fix vlans’ option and creating a vlan 100 sub interface on my router.
I have ran the ‘omci_pipe.sh md | grep -E ‘^\|\s+(84|171)\s\|’
and got an empty response.
Any ideas where to troubleshoot next?
Hi Stephen O2.3 sounds more line the info is not correct as your not even getting to O5.
I would first double check the info on the pon config page to ensure it matches the values form your Hub5x.
If your still having issues reach out via the 8311 discord channel and we can help further 🙂
Great article, having just had VM XGS PON installed in my area, I am thinking of moving over for the speed boost until Openreach finally get fibre installed.
my router only has 2.5gb ports and housed at the other end of the house with cat6 already in place, so I am not sure which way to go,
The media converter as per this link:
https://www.aliexpress.com/item/1005007391933720.html?spm=a2g0o.productlist.main.1.3cf47Yqk7YqkRH&algo_pvid=5ae61d33-415b-4897-967b-eb974d3e6bd0&algo_exp_id=5ae61d33-415b-4897-967b-eb974d3e6bd0-0&pdp_npi=4%40dis%21GBP%2196.42%2129.89%21%21%21875.75%21271.48%21%40211b80e117253493574571335e9c44%2112000040567142154%21sea%21UK%216035032281%21X&curPageLogUid=b8FveCacwu9m&utparam-url=scene%3Asearch%7Cquery_from%3A
or a small switch – these 2 looked ok but going up in price
https://www.amazon.co.uk/Binardat-Ultra-Mini-Unmanaged-Multi-Gigabit-Wallmount/dp/B0CQM3MGMV/ref=pd_ci_mcx_di_int_sccai_cn_d_sccl_3_4/262-6062350-6763462?pd_rd_w=d1BxA&content-id=amzn1.sym.6448d24d-f04d-4e11-90e5-10165d266aa2&pf_rd_p=6448d24d-f04d-4e11-90e5-10165d266aa2&pf_rd_r=88KRFQ3NNNZZV7FM1MHJ&pd_rd_wg=47tTn&pd_rd_r=1ad4efcd-c201-4420-98f3-d2b0497ae98b&pd_rd_i=B0CQM3MGMV&psc=1
https://www.amazon.co.uk/MikroTik-CRS305-1G-4S-IN/dp/B07LFKGP1L/?_encoding=UTF8&pd_rd_w=NOaKU&content-id=amzn1.sym.23de1171-f5c7-4e79-b72f-cf461366ee95%3Aamzn1.symc.9c69961c-776f-45c4-b797-9eea1239a3fb&pf_rd_p=23de1171-f5c7-4e79-b72f-cf461366ee95&pf_rd_r=P6C7AYSCJYJSKD6YR3JF&pd_rd_wg=wFIFQ&pd_rd_r=1e725a48-14f2-40be-970b-7cd3e8d9af43&ref_=pd_hp_d_atf_ci_mcx_mr_ca_hp_atf_d
Any recommendations?
Hi Andy,
Thank you for the kind feedback glad you liked the blog.
If you have not had the Virgin fibre connection installed yet then its possible they may be able to install the fibre where your existing router is.
In terms of installing the WAS-110 I would avoid media converters as they dont work very well together so would be looking at the switch route I use MikroTik myself so would personally recommend them however I know others have had success with cheaper switches.
Kind Regards,
Nathan
Hi Nathan, I’m trying to get my Virgin Media WAS-110 setup running. Here’s my setup:
-The WAS-110 is running v2.8.0 and is connected to a switch.
-From the switch, I’ve tried connecting either my Eero 5 router or my GL.iNet AR-150 travel router.
-I followed the pon.wiki guide and get an O5.1 state with “Associated” status, which seems valid (not a fake one).
-I’ve disabled VLAN tagging and added VLAN 100 for both routers
-The port is set to a fixed 10Gb.
However, I still can’t get internet access.
Am I missing any critical steps, or does anyone have suggestions for further troubleshooting?
Thanks in advance!
Hi Enrique,
Have you tried spoofing the VM routers MAC address on your own router? I know this step is needed for some to get a connection.
Other than that if you can I would join the 8311 discord and post in the UK>General channel where myself and others can help diagnose further 🙂
If you don’t do Discord feel free to email me [email protected]
Kind Regards,
Nathan
This was my issue! Spent a while getting no IP and then after reading this I realised that I still had my old MAC added from Sky in OPNSense. Changed it to the Virgin one and everything connected instantly.
Hi Nathan.
Thank you for sharing this. I’m not as technically minded but am looking to use my own mesh system and bypass the Virgin Media 5x.
Would something like this be suitable to use TP Link XGZ030 instead of having to buy a module abd relevant equipment please? Thanks.
Hi Resham, I don’t believe that device would be compatible with VM/Nexfibre’s XGSPON service as it does not support VEIP either way its not been tested before.
The WAS-110 is currently the only fully tested way to bypass the Hub5X completely.
If your just looking to replace the Hub 5x’s Wi-Fi you could just get a mesh Wi-Fi system, disable the Hub5X’s Wi-Fi and use the Mesh Wi-Fi system in Wi-Fi mode or double NAT to use in router mode.
Feel free to post in the 8311 discord UK general channel if you have any further questions 🙂
Kind Regards,
Nathan
Hi Nathan,
For some reason I can’t click in to view your steps, I’ve tried on a couple browsers plus mobile. It just highlights the step numbers but doesn’t open.
Hi Dave,
Apologies for this looks like a recent upgrade broke the accordion element have now fixed this please clear your browser cache if your still having issues (F12 , network disable cache then refresh site)
Hey Nathan.
Wondering if you can sanity check your website please ? For me, I cant open any of the ‘steps’ of your Hub5x WAS-110 replacement guide – Chrome or Edge.. neither works for me.
Many thanks
Hi Paul,
Apologies for this looks like a recent upgrade broke the accordion element have now fixed this please clear your browser cache if your still having issues (F12 , network disable cache then refresh site)
Hi, the first 2 github links before the guide no longer work, as they both return a 404 error, and also none of the steps in your guide open up when i click on them – be that either with Safari, Chrome, Firefox and also trying these browsers on MacOs and Windows 11.
Hi Gordon,
Apologies for this looks like a recent upgrade broke the accordion element have now fixed this please clear your browser cache if your still having issues (F12 , network disable cache then refresh site)
thank you for the heads up regarding the duff links have updated this as well
Hi, I can’t seem to get the steps to open any more? Not sure if it’s just me but have tried on different networks and devices.
Trying to get to the config steps to double check my config as have upgraded to symmetric speeds and getting the upload on the Virgin hub but it’s maxing out at 100 on the WAS-110 so any ideas on that one too would be great!
Hi Jon
Apologies for this looks like a recent upgrade broke the accordion element have now fixed this please clear your browser cache if your still having issues (F12 , network disable cache then refresh site)
If you require further assistance please reach out to us in the 8311 Discord chat or feel free to email me.
This is amazing!
Bypassing the Virgin Media Hub 5x and going straight to a UDM-PRO SE. The performance difference is significant. Shows you how bad standard ISP routers are.
Thanks!
Hi Andy, did you install the SFP into the UDM-PRO? Thanks.
I did.
Hi,
Noob question here. It seems you connect your was-110 to a switch and not a router. I was told I had to put it into a router which appears to be wrong. Can I therefore put my router after the switch as would seem possible from your photos. I as this because I have more sfp+ on the switch and only 1 on the router. Thanks in advance and apologies if I have misunderstood.
Hi Mark,
Yes you can use the WAS in a switch providing the switch has SFP+ ports.
Now if you go for an unmanaged switch you will only be able to plug in the WAS and your router if you want to be able to plug other devices into the switch you will need a manged switch like mine which lets you configure VLANs on each port.
I have mine connected to a MikroTik CRS317-1G-16S+ running in Switch OS mode, I have the SFP+ port with the WAS set as VLAN 301 and my router has a LACP bond from the same switch with 2* 10Gb links this is set to accept all VLANs and inside my pfSense router I have the WAN interface configured on VLAN 301.
So just giving some recent feedback of my journey – hopefully all welcome. So I got VM 1Gig service a few months ago with its (awful) Hub 5x. Swapped in a pair of tp-link BE9300’s linked over ethernet (which are superb). The Hub 5x was total hit and miss with modem mode. Enabled it.. had to turn the hub off to move it a few days later and it wouldn’t work any more even after reset etc.. so had to run double-nat instead. Randomly, modem mode did work a few weeks later following exactly the same process again but its just so random .. too random and bound to stop working at the most inconvenient time.
Encouraged by this page I set about buying a SFP+ module from Fibermall. It arrived but it wouldn’t stay up for more than 5 minutes and just constantly rebooted itself (you could see it in the logs). this was with/without live fiber in a mixture of various Cisco/Mikrotik switches – all the same. Now 5 mins isnt even long enough to try and flash the firmware safely. Fiber Mall were really good and shipped it back and sent a replacement. Just the same. In fact maybe they just re-flashed the same module and sent it back. I kind of wish I’d taken note of the serials. So back the second one went too. At this point I thought I’m just going to take a flyer on one from Aliexpress so bought one of these (hope this link is OK to post here)
https://www.aliexpress.com/item/1005007856556526.html?spm=a2g0o.order_list.order_list_main.5.3b2e1802ltDBJg
Came with 8311 v2.8 pre flashed.. plugged it in .. stayed up which was a good start. Entered the details from this brilliant guide and hey presto. All good with advertised speeds.
So bit of a journey. Now just hoping it all proves to be reliable and persistent.
Thank you for the great guide here. Wouldnt have attempted it without it.
Hi Paul thank you for the kind feedback and sorry to hear you had issues with the Fibremall WAS sticks.
Thanks for the heads up on the aliexpress model which comes pre flashed with the 8311 firmware that is useful to know..
Hi there,
Mine did the same plugged into a UDM-PRO SE. I took the chance updating the firmware via Terminal once it had stayed up for 30 secs or so and managed to flash it.
Once it had the 8311 v2.8 on it, it has worked fine. The temperature is hot but with a fan directed at it, mine stays at 50c.
https://www.amazon.co.uk/Minthouz-Rechargeable-Operated-Portable-MT-L018F-BL/dp/B0C2GR9VRD/ref=sxin_14_pa_sp_search_thematic_sspa?content-id=amzn1.sym.175015bb-af6e-4272-bb25-0db46ad19df4%3Aamzn1.sym.175015bb-af6e-4272-bb25-0db46ad19df4&crid=3VCLPHV41HZ13&cv_ct_cx=mini+fan&keywords=mini+fan&pd_rd_i=B0C2GR9VRD&pd_rd_r=c2c187f2-0aab-4b2f-8389-9491e1036c75&pd_rd_w=iVNN0&pd_rd_wg=nuGvp&pf_rd_p=175015bb-af6e-4272-bb25-0db46ad19df4&pf_rd_r=PJ6WF71CEMW9JQFPTFFX&qid=1742890798&s=kitchen&sbo=Tc8eqSFhUl4VwMzbE4fw%2Fw%3D%3D&sprefix=mini+fan%2Ckitchen%2C81&sr=1-1-05780890-21ab-403d-a3cd-afad51599a8f-spons&sp_csd=d2lkZ2V0TmFtZT1zcF9zZWFyY2hfdGhlbWF0aWM&psc=1
Thanks!
Thank you very much for this.
Followed your instructions and was able to bypass the VM hub.
Super thrilled. Thank you again.
No worries Leigh glad you found it useful!
UCG Fiber Gateway
WAS-110 (unconfigured).
Great guide and I thought I’d throw my 2p in to see if it helps anybody.
Firstly , the UCG FG will only fire up the PON stick if it is connected to fibre. This presents an immediate problem, as you then have no internet to look at instructions / video! Had on ipad on 5G so not a big problem but laptop for programming did not. So tip is to download this webpage before it’s disconnected as otherwise your typing all the codes by hand rather than copy/paste into powershell.
Tip-open the webpage a couple of times so it’s open on more than one tab. The root password instruction link opens on the page you are on and you lose the webpage!
Make sure you download the firmware before you lose the internet (fairly obvious).
Setting up a static route was fairly easy on the gateway – Settings – Routing – Static Routes (tab) – Create Entry – Name: WAS110 Distance: (Blank) Dest Network: 192.168.11.0/24 Type: Interface Value: WAN
Admin password wasn’t one of the one’s above. Used the script and generated txt file. Looked up xml converter on google and copied text into it. Found password fairly easily.
Had problems with Step 10, just wouldn’t work and drove me potty. Found a solution on discord, you need to add -O athe beginning of the code (-big oh). Then worked fine.
ssh -O -oHostKeyAlgorithms=+ssh-rsa -oPubkeyAcceptedKeyTypes=+ssh-rsa [email protected].1 ‘tar xvf /tmp/local-upgrade.tar -C /tmp/ — upgrade.sh && /tmp/upgrade.sh -y -r /tmp/local-upgrade.tar’
Also useful to have the ssh folder open in finder so you can delete the ssh hosts file more conveniently. The deletion of the ssh file is something shown in the video but not the written steps.
Been up and running on Virgin for 24 hours now and it’s fantastic.
Haven’t messed around with any VLAN numkber and seems to work.
Virgin stream boxes (Ihave 3) are all working with no problem at all.
Hope this helps
Thanks for the feedback Charles I have made some updates to the guide reflecting the points you raised.
Kind Regards,
Nathan
Thanks
Noticed when I copied code into comment that it had the double minus turning into a dash problem. (noted further up inthe comments)
I see it is corrected in your step 10. 😊
does this improve/stablise the ping at all? ping times although low are quite erratic on my xgs virgin (ranging from 3ms to 8ms) wondering if thats normal on virgin or its the hub being rubbish
When you say your latency ranges from 3-8ms is that pinging the same thing or different things?
Latency will very depending on what your pinging and what route VM decides to route the traffic VM is known for odd routing sometimes.
There was an issue particular with the Gig2 package where VM’s automated speed tests/checks once an hour overwhelmed the hub5x causing very high latency spikes and the WAS-110 does fix that as it eliminates the hub5x.
I personally did not see any general latency improvements between the hub5x and WAS.
pinging anything (even my second hop IP on a tracert which is my nearest virgin POP is 2ms-5ms)
i think maybe ICMP is just lower priority on virgins network but no way to confirm this. not that is causes a problem, just unstable compared to other providers fttp (even fttc was solid). was wondering if it was the routing or just virgins network
router**
Ordered my WAS_110 today from Fibre Mall, worked out at £155 including DHL delivery. It has the option to order with the 8311 community firmware installed, so I selected that and will see what version it arrives with. Was great to find your page with all this useful info. The current Hub5 modem mode dies every few months, so I have to factory reset and go through the hassle to put it back. Hopefully this will resolve that for me and remove their shonky hub totally.
Ah cool did not realise FibreMall are now doing a version with the 8311 firmware pre loaded.
I’ve just got around to installing it, and it didn’t ship with the cable & adapter. I found this one on Amazon which I believe is the right adapter for the Virgin fibre:
https://www.amazon.co.uk/dp/B0CNZZGY5B
LC/UPC Female – SC/UPC Male
Will give it another try tomorrow once the adapter arrives (how did I ever manage without next day tech deliveries!!)
Hi Dan, its LC/APC to SC/APC cable or adaptor as per my pre requisites section UPC is the wrong type and will damage your module and fibre faceplate coupler.
Oops, good catch, thanks. Ordered this one instead:
https://www.amazon.co.uk/dp/B085DPJYYS
SC/APC Male to LC/APC Female
Hi Nathan when ditching the 5X router have you noticed any improvement in latency?
Hi James,
Not a huge difference in latency although as your bypassing the Hub5X and VM’s remote management/monitoring shenanigans that stops any potential spikes in latency/performance that can cause.
Hello All,
Can I install the SFP into a Ubiquiti UniFi Dream Machine Pro firewall? Or do I need and extra switch? like this one?
https://www.amazon.co.uk/MikroTik-CRS305-1G-4S-IN/dp/B07LFKGP1L/?_encoding=UTF8&pd_rd_w=NOaKU&content-id=amzn1.sym.23de1171-f5c7-4e79-b72f-cf461366ee95%3Aamzn1.symc.9c69961c-776f-45c4-b797-9eea1239a3fb&pf_rd_p=23de1171-f5c7-4e79-b72f-cf461366ee95&pf_rd_r=P6C7AYSCJYJSKD6YR3JF&pd_rd_wg=wFIFQ&pd_rd_r=1e725a48-14f2-40be-970b-7cd3e8d9af43&ref_=pd_hp_d_atf_ci_mcx_mr_ca_hp_atf_d#averageCustomerReviewsAnchor
Thanks!
I am hoping to move to Ubiquiti gear, the Cloud Gateway Fiber, once I test the module out. Someone posted they had gone that route.
https://uk.store.ui.com/uk/en/category/all-cloud-gateways/collections/cloud-gateway-fiber/products/ucg-fiber
It’s got a 10Gb SFP+ WAN port, same as Dream Machine Pro so that module ‘should’ go straight in there without need for another switch.
I have a module on backorder with Better Internet Store with the preloaded firmware and serial set.
I’ll update once I test…
Thanks so much for the reply!
I hope your tests are positive. Looking forward to your reply.
WAS Module worked out the box, just plugged into my tester switch and it picked up the internet connection with nothing to do.
I have now switched completely to UniFi gear, got the UniFi Cloud Gateway Fiber, along with couple Wifi access points and new switches. That has been a bit up and down, while I get used to it.
I am finding that the upload speed is much reduced, at least according to the testing I’ve done. The Fiber gateway has its own built in tester, and also been doing it with various internet speed test sites and VM’s own. The VM package is 1gbps symmetric. The contract was renewed recently and I had a bit of bother with VM customer service applying the upload add-on as I had before – it was removed at one point in the procesds and then added back on. I can’t say for sure, but I think the problem with the upload speed started then, I’d never seen any issues before that.
Download is pretty rock steady on the 1gbps service, but upload speed can be all over the place. Just today I did some tests, was down to 80 Mbps at one point. Then I tested later, and was near 1 Gbps.
I’ll just have to keep an eye on it and see how it goes – if it doesn’t improve, then I may need to put the VM hub back on for some additional testing and see what it yields.
What should I be looking for on the WAS module to verify there’s no issues there? Temps are high (80-celsius) I’ve got a fan on it (smallish desktop type as the Fiber is in the living room), but doesn’t appear to be doing much for it.
Download speed seems to have stabilised – the fan I had blowing on the module was plugged into the USB port on my TV. Becasue the VM ONT is in the living room, the UCG Fiber is hiding behind my TV. Didn’t realise that when the TV was off, the fan wasn’t spinning. It’s been moved to a separate USB brick so it’s on 24×7 now – getting consistent speeds for the upload now at 1Gbps. So looks like this module will either throttle itself, or there’s enough errors on upload to slow it down maybe. Either way, it’s now in monitoring to make sure it stays cool and speed is consistent. The UCG Fiber can do its own automated testing at least so I just have to review the logs.
Just finished the steps listed above, few hiccups but I’d seen comments to help with those.
Now running firmware 2.8.0 and will be switching out the Hub5X in the next few days…
I had a question about Software Version A + B … Do we periodically have to change this since I used the values in Step 13… Wonder if there’s a list of the current values (if necessary)…
Great guide though Nathan!!
Hi Jamie thanks for the kind feedback at present those software versions are the correct ones if this changes I will update my guide accordingly.
Kind Regards,
Nathan
the guide seems way out of wack compared to whats on mine
7.8.0-2410.5
Created a blower mount for the module
https://www.thingiverse.com/thing:7059909
Takes a standard 50mm blower (5V USB version https://www.amazon.co.uk/dp/B0BB6RK4G6). Dropped the temperature to <50C.